
How to set network connection on Mk3 controller
How to configure network settings for Mk3?
Computer can communicate with Mk3 controller via USB or Network connection.
If you choose to use Network connection then make sure that your computer with installed CNCUSB controller software is connected to network with network cable. One side of network cable goes to network switch, the other side goes to computer.
The same goes for controller network cable. One side goes to network switch other side goes to controller.
STEP 1: DISABLING WINDOWS FIREWALL
Windows firewall protection can prevent your computer from accessing controller over network. You can allow CNCUSB software to communicate with controller through Windows firewall.
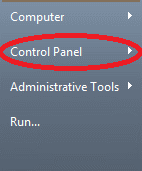
1.)Click “Start” button
![]()
2.) Find and click “Control Panel”
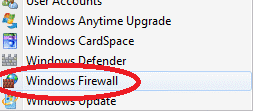
3.) Click “Windows Firewall”
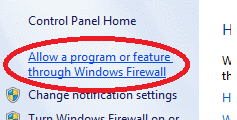
4.) Click “Allow a program or feature through Windows Firewall”
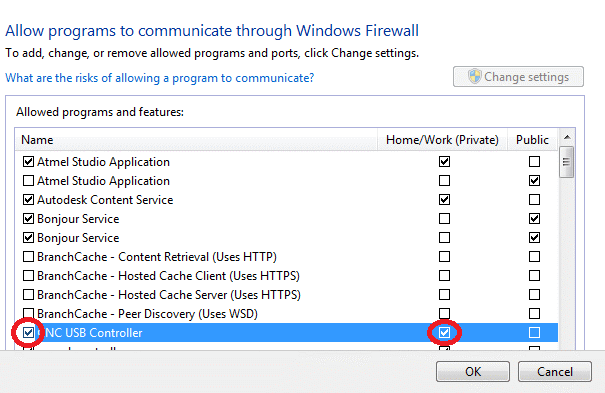
5.) From list find “CNC USB Controller” entrie and enable first checkbox and the one under Home/Work.
Go to Step 2.
STEP 2: CONNECTING YOUR CONTROLLER TO NETWORK
Plug your network cable into Ethernet connector on Mk3 controller.
Start CNCUSB controller software and click: File/Settings/Connection.
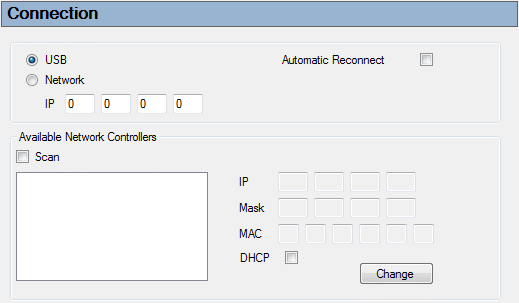
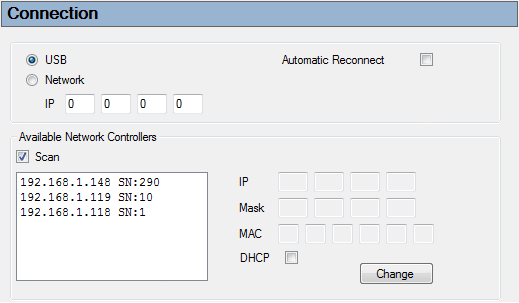
Enable “Scan” option and wait for about 30 seconds, and if everything is OK, you should be able to see your controller ( its serial number and IP number) on scan list.
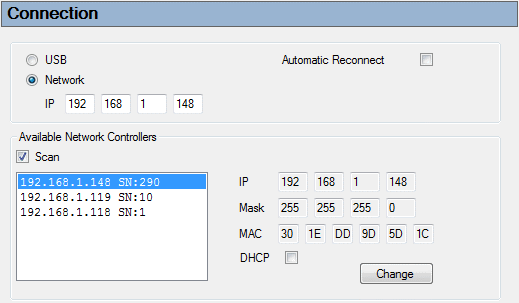
Now enable “Network” option. If you double click selected controller, its IP address copies into IP value boxes.
If you don’t see your controller on scan list proceed to Step 3.
STEP 3: RESETTING CONTROLLERS NETWORK SETTINGS
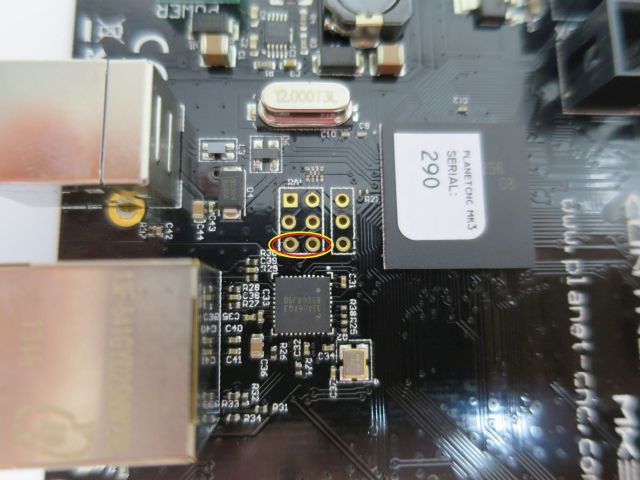
To reset the controller you have to “jump” two designated pins for about 15 seconds.
NOTE: Make sure that you don’t create any other short circuit on the board and that you are “jumping” the correct two pins. We recommend using tweezers for this.
1.) Unplug your power supply and USB cable ( Green “Power” LED must be OFF )
2.) Place jumper or create shortcut between two designated pins (see picture below)
3.) Plug in your power supply. (LED will be blinking rapidly for about 15 seconds then it will start to blink in bit slower frequency. This will indicate that your controllers network settings have been reset.)
4.) Remove jumper or shortcut from designated pins.

Controllers IP address is now 192.168.1.200 and DHCP option is enabled.
This assures that IP address and DHCP option are really at default values in case someone was changing controllers network settings.
Unplug and plug in your power supply and again try Step 2. If you still don’t see your controller on scan list then go to Step 4.
STEP 4: IDENTIFYING COMPUTERS IP ADDRESS
In order that your computer properly communicates with controller, computer and controller must be on the same network, which means that computer and controller must have the same sub net number.
Procedures below will help you to configure network settings of your computer and controller.
Identify how your computer gets its IP address assigned
The easiest way to find out is to click:
1.)Click “Start” button
![]()
2.) Find and click “Control Panel”
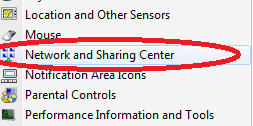
3.) Network and Sharing Center
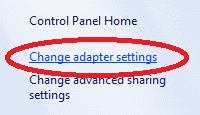
4.) Change adapter settings
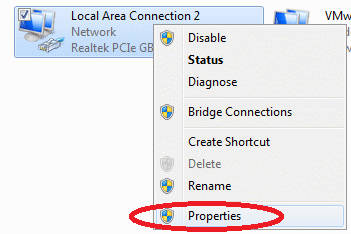
5.) Right-click on your local area connections and click Properties.
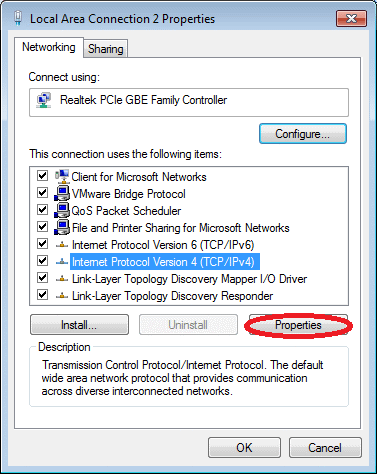
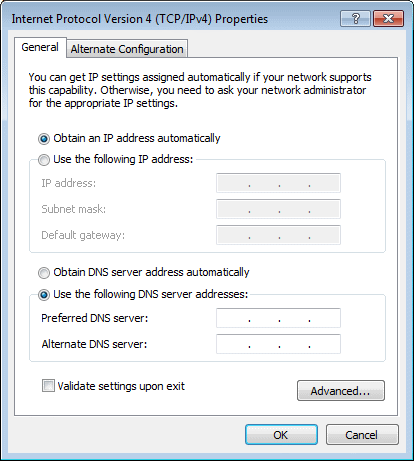
6.) Select Internet Protocol Version 4(TCP/IPv4) and click Properties.
Here you will be able to see if option “Obtain an IP address automatically” or “Use the following IP address” is selected.
Option A: DHCP service present
If option “Obtain an IP address automatically” is selected, then your computer is probably using DHCP or is not on the network.
If your computer is on the network and is using DHCP then reason why your controller is not visible on the scan list is probably something else (make sure you followed Step 1 and Step 2).
If your computer is not on the network then see Option C.
Option B: Configuring controller network settings for network without DHCP service
If option “Use the following IP address” is selected, then this means your network does not have DHCP service present.
When you connect your controller to network, controller waits for IP number from DHCP for about 30 seconds.
If after 30 seconds IP isn’t assigned, controller gets last assigned IP number. New controllers have this number in range 192.168.1.100 to 192.168.1.200.
This IP number maybe isn’t recognized by your network and therefore your controller is not visible on scan list.
You will have to:
1.) Change computers network adapter settings to be able to connect with controller (Step 5).
2.) When you are connected with controller change controllers network settings (Step 6).
3.) Change your adapter settings back the way they were (step 7).
It is advised that you write down computers network adapter values to avoid any stress later.
Go to Step 5.
Option C: Not on network
If there is no available network, your computer and controller can communicate if you connect them with network cable.
Connect your computer and controller with network cable and go to Step 5.
STEP 5: CHANGING COMPUTERS NETWORK ADAPTER SETTINGS
Like it was said previously in tutorial, if there is no DHCP device present in your network, controller gets last assigned IP number.
These numbers are range 192.168.1.100 to 192.168.1.200. But since you had to perform Step 2 (reset controller network settings) controllers IP address is 192.168.1.200.
Now you must set your computers network adapter settings to this sub net so that you will be able to change controllers network settings.
For Windows7:
1.)Click “Start” button
![]()
2.) Find and click “Control Panel”
3.) Network and Sharing Center
4.) Change adapter settings
5.) Right-click on your local area connections and click Properties.
6.) Select Internet Protocol Version 4(TCP/IPv4) and click Properties.
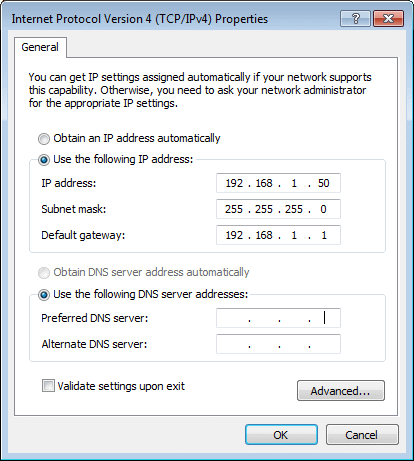
7.) Write down all current numbers of IP Address, Subnet Mask and Default gateway. You will need them later.
8.) Now for IP Address type in : 192.168.1.50
For Subnet Mask type in: 255.255.255.0
For Default gateway type in: 192.168.1.1
Go to Step 6. (If there is no available network go to Step 6.1)
STEP 6: CHANGE CONTROLLERS NETWORK SETTINGS
Connect your computer and controller with network cable.
Start CNC USB controller software. Click: File/Settings/Connection. Enable ‘Scan’ option.
If everything works, you should see your controller (its default IP address 192.168.1.200 and serial number) on scan list.
Select your controller from scan list and click the ‘Change’ button.
Disable DHCP option and for “Subnet mask” and “Default gateway” type in the values of your network adapter that you previously wrote down. For “IP address” first three values are the same as the values of your network adapter, just fourth value should be unique.
Click OK to confirm and save changes made. Now unplug/plug power supply.
Disconnect your computer and controller and connect controller to your network.
Go to Step 7.
STEP 6.1: CHANGE CONTROLLERS NETWORK SETTINGS
Connect your computer and controller with network cable.
Start CNC USB controller software. Click: File/Settings/Connection. Enable ‘Scan’ option.
If everything works, you should see your controller (its default IP address 192.168.1.200 and serial number) on scan list.
Select your controller from scan list and click the ‘Change’ button.
Disable DHCP option and click OK to confirm and save changes made. Now unplug/plug power supply.
This is your final step if you don’t have network available.
STEP 7: RESTORING SETTINGS OF COMPUTERS NETWORK ADAPTER
Don’t forget to restore previous “IP Address”, “Subnet mask” and “Default gateway” values of your computers network adapter.
Connect your computer and controller to your network. You should now be able to see your controller on scan view.

