Using o-words with PlanetCNC TNG software: Loop blocks

You can use loop o-words with PlanetCNC TNG.

Sometimes you need to execute line(s) of g-code in a loop while evaluating specific condition.  When condition evaluates to false, program will exit loop. This comes useful for e.g. repetitive motion sequences, parameter manipulation etc…

O-word loop commands consist of:
O-do – Begin loop block
O-while – End loop block [or condition evaluation]
O-endwhile – End loop block
O-break – Exit loop block immediately
O-continue – Skip to next condition evaluation of  the while condition

You can use two types of loops: While – Endwhile or Do – While.

While – Endwhile:
Evaluates condition on the beginning of loop and then executes the lines of code inside the loop.

Do – While:
First executes the lines of code inside the loop and then evaluates condition at the end of loop.

Example of Do – While loop:

%
 #1 = 1
 o100 do
 (print, #1)
 #1 = [#1+1]
 o100 while[#1 LE 10]
 (print,loop finished)
 %

The content of the loop will repeat for as long as while condition at the end will remain true. Which means that as soon as parameter #1 exceeds value of 10, program will exit the loop and print

loop finished


Example of While – Endwhile loop:

%
#1 = 1
o100 while [#1 LE 10]
 (print, #1)
 #1 = [#1+1]
o100 endwhile
 (print,loop finished)
%

The content of the loop will repeat for as long as while condition at the beginning will remain true. Which means that as soon as parameter #1 exceeds value of 10, program will exit the loop and print

loop finished

Example of break used in a Do – While loop:

%
#<A> = [2**0]
#<B> = 0
#1 = 0
o100 do
 (print, #1)
 #1 = [#1+1]
 G04 P1
 o200 if [AND[#<A>, #<_hw_input>]]
  #<B> = 1
  o100 break
 o200 endif
o100 while[#1 LE 10]

o300 if [#<B> EQ 0]
 (print,loop finished)
 o300 else 
 (print,preemptive loop break)
o300 endif
%

The content of the loop will repeat for as long as input 1 of controller is not active and while condition at the end remains true. Which means that as long as input 1 remains un-active, counter will count to 10 and program will exit the loop normally and print:

loop finished

As soon as input becomes active during counting, program will exit loop and print:

preemptive loop break

Using o-words with PlanetCNC TNG software: Conditional statements

You can use o-word conditional statements with PlanetCNC TNG.

O-word conditional statement consist of  if, elseif, else and endif keywords.

All keywords of the same conditional statement should use same o-word number.

Example of if…endif conditional statement:

%
#1=10
o100 if [#1 EQ 10]
 (PRINT,Condition is true)
o100 endif
%

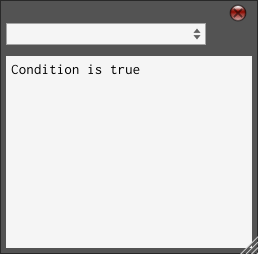
Parameter #1 is assigned value 10. o100 if statement checks if parameter #1 equals (EQ) value 10. Because condition is true, program executes print command that is included in this conditional statement. o100 if statement is ended with o100 endif.

This code will display in Log:

Example of if, else…endif conditional statement:

%
#1=10
o100 if [#1 EQ 9]
(PRINT,10 equals 9)
o100 else
(PRINT,10 does not equal 9)
o100 endif
%

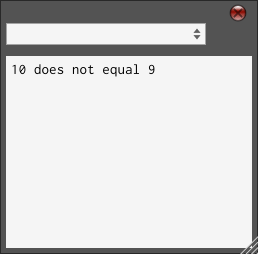
Paramter #1 is assigned value 1o. o100 if statement checks if parameter #1 equals (EQ) value 9. Because condition is not true, program jumps to o100 else statement and executes print command unconditionally.

This code will display in Log:


Example of if, elseif…endif conditional statement:

%
 #1=10
 o100 if [#1 GT 20]
 (PRINT,10 is greater than 20)
 o100 elseif [#1 LT 20]
 (PRINT,10 is less than 20)
 o100 endif
 %

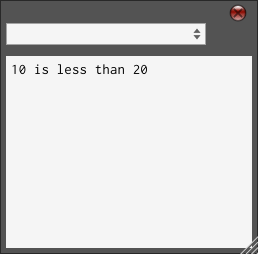
Paramter #1 is assigned value 1o. o100 if statement checks if parameter #1 is greater  than (GT) value 20. Because condition is not true program jumps to o100 elseif statement where its checked if parameter #1 is less then (LT) value 20. Because condition is true, program executes print command that is included in o100 elseif conditional statement. Also note how if, elseif and endif keywords use same o-word number.

This code will display in Log:

Using o-words with PlanetCNC TNG software: Subroutines

Some CNC jobs demand repetition of the same motion over and over again, e.g.: drilling of a 100 holes. If we want to re-use the existing g-code pattern throughout the main program,  we can use subroutines.

Subroutine is basically a program block which is executed the moment it gets called from main program.

Subroutine program can be located within the same g-code program from where it gets called, or it can be standalone program file.

Subroutine o-word commands:
o-sub – Begin subroutine
o-endsub – End subroutine
o-call – Call subroutine
o-return – Exit subroutine


o-call:
Subroutine is called using o-call command.

o-sub and o-endsub:
Subroutine program block is defined with o-sub and o-endsub brackets. Everything within these brackets will be executed when related subroutine is called.

When o-endsub is encountered, program jumps back to the line where subroutine was called and continues with execution or remaining main program.

o-return :
User can achieve the same effect as o-endsub also with the use of o-return command.


Example of subroutine call:
Program below will call three subroutines from main program.
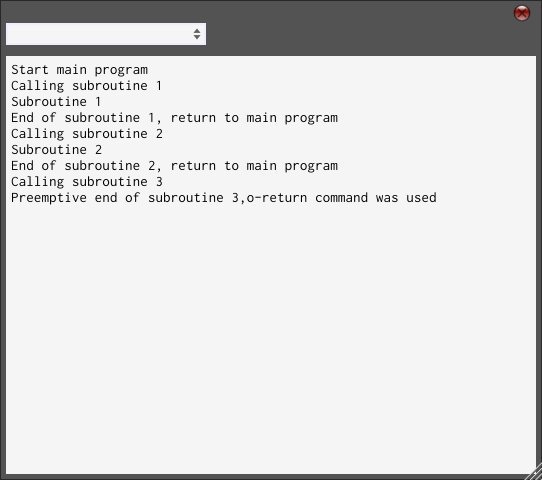
First and second subroutine will print to log window while third one will print nothing since o-return command will be used.

To observe the subroutine behavior open log window: Help/Show Log


%
(Main program)
(PRINT,Start main program)

(PRINT,Calling subroutine 1)
o100 call
(PRINT,End of subroutine 1, return to main program)

(PRINT,Calling subroutine 2)
o101 call
(PRINT,End of subroutine 2, return to main program)

(PRINT,Calling subroutine 3)
o102 call
(PRINT,Preemptive end of subroutine 3,o-return command was used)

o100 sub
(PRINT,Subroutine 1)
o100 endsub

o101 sub
(PRINT,Subroutine 2)
o101 endsub

o102 sub
o102 return
(PRINT,This should never be printed)
o102 endsub
%

Log window will display this:

User can also call external subroutine program files.
In such case, syntax is slightly different than when calling subroutines that are located withing the same g-code program.

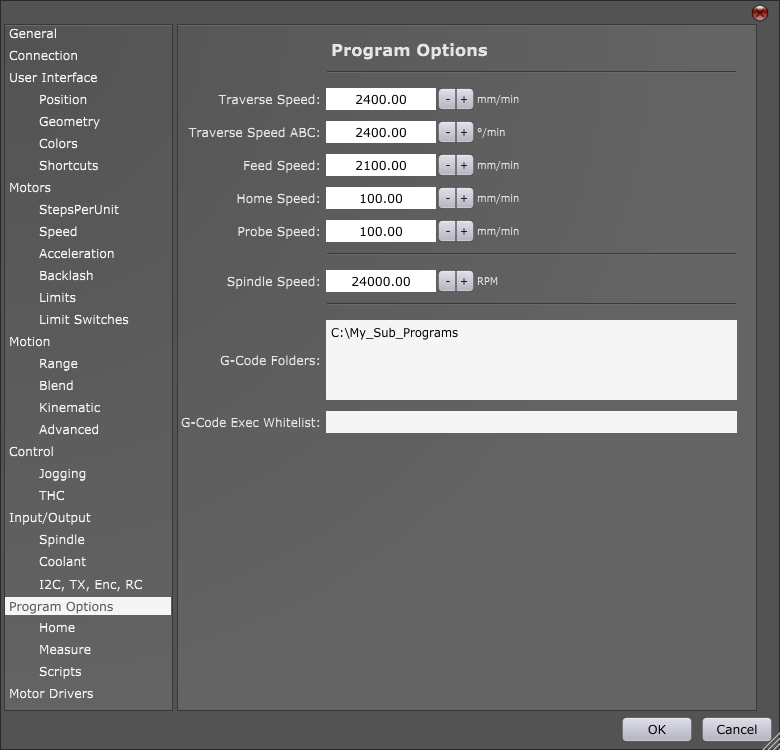
Subroutine program file location is defined in settings: File/Settings/Program Options-> G-code folders. Insert pathway to files location:


Subroutine program file should have an filename.sub file extension.

Subroutine program file code is defined with o<filename> sub and o<filename> endsub brackets.
When o-endsub is encountered, program jumps back to the line where subroutine was called and continues with program execution. User can achieve the same effect with the use of o-Return command.

Subroutine program file is called using o<filename>call command.


Example of subroutine file call:

Create file: Sub_example.sub

Open it with text editor and write:

o<Sub_example> sub
(PRINT,Subroutine file program)
o<Sub_example> endsub

Main program will call subroutine file:

%
(PRINT, call subroutine file)
o<Sub_example> call
(PRINT,This should be printed last)
%

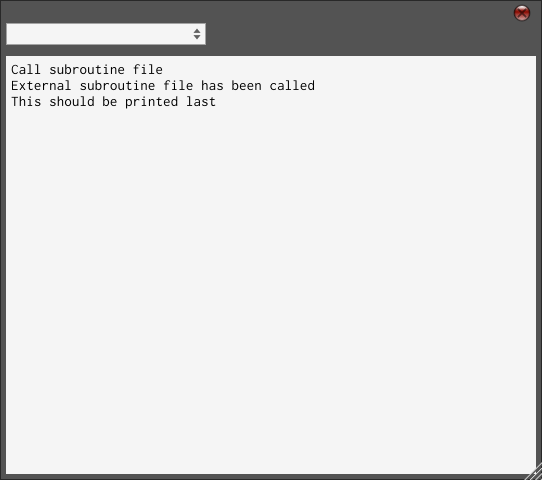
Program above will call external subroutine file from main program.
To observe subroutine file behavior open log terminal: Help/Show Log

Log window will display this:

Using LOG command with PlanetCNC TNG software

If you want to save your variable and parameter values or any other log data in a form of a file, you can use LOG command.

LOG: Writes to LOG file
LOGCREATE: Creates new LOG file.
LOGOPEN: Adds content to previously created LOG file
LOGCLOSE: Closes LOG file


Example 1: G-code program will create LOG file where desired data will be saved.

%
(LOGCREATE,DataLOG.txt)  
(LOG,This text is saved in "DataLOG.txt" file)
(LOGCLOSE)
%


Example 2: G-code program will create two separate LOG files where data will be saved.

%
(LOGCREATE,DataLOG 1.txt)
(LOG,This text is saved in "DataLOG 1.txt" file)
(LOGCLOSE)

(LOGCREATE,DataLOG 2.txt)
(LOG,This text is saved in "DataLOG 2.txt" file)
(LOGCLOSE)

(LOGOPEN,DataLOG 1.txt)
(LOG,This text is also saved in "DataLOG 1.txt" file)
(LOGCLOSE)

(LOGOPEN,DataLOG 2.txt)
(LOG,This text is also saved in "DataLOG 2.txt" file)
(LOGCLOSE)
%

Example 3: G-code program will create LOG file where value of machine work position will be saved. This is a great way to “track” and store values of desired parameter.

%
G00 X0
(LOGCREATE,Work PositionLOG.txt) 
(LOG,Work position start:#<_x>)
(LOGCLOSE) 
G00 X100
(LOGOPEN,Work PositionLOG.txt) 
(LOG,Work position end:#<_x>)
(LOGCLOSE)
%


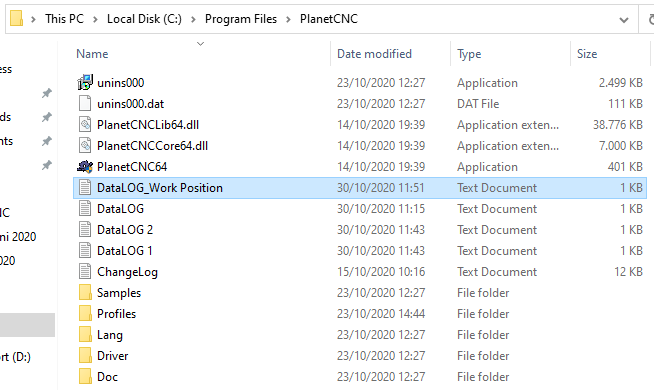
Created LOG files are located in main installation folder of PlanetCNC TNG. User can also explicitly tell where created LOG file will be located.


Using o-words with PlanetCNC TNG software

With PlanetCNC TNG it is possible to control g-code program flow. For this purpose you can use o-word g-codes.

o-words are formed as blocks and can be, based on their functionality, categorized into 4 groups:

SUBROUTINE
(subroutine block)

CONDITION
(if..endif,elseif,else…block)

LOOP
(do…while, ehile..endwhile loop block)

REPEAT
(repeat…endrepeat block)


During this multipart tutorial series we will try to explain the use and behaviour of each particular O-word group.

To understand the working principles and behaviour of a different o-word block we would recommend that user first gets
familliar with the PRINT command.


Using the G04 g-code with PlanetCNC TNG software

In machining it is sometimes necessary to stop the motion of all axes for a given amount of time (for example to let the spindle come up to speed or wait for the coolant to start flowing). This is called dwell. It’s activated with the G04 command. The time is specified using a P-word and a number seconds (the number is a float so fractions of a second can be used).
For example: G04 P3.7

A common place to use the G04 dwell command is when starting a spindle of a machine. Because it can’t accelerate instantly to the desired speed we need to allow it some time to speed up before starting to cut the material. An example of code that waits 5 seconds after starting the spindle at 10000 RPM is here:
M03 S10000
G04 P5

Using G02 and G03 g-codes with PlanetCNC TNG software

Another two g-codes used to specify machine movements are G02 and G03. They move the machine in an arc, in contrast to G00 and G01 which move the machine in a straight line.

G02 moves the machine in a clockwise arc and G03 moves the machine in a counterclockwise arc.
To use these codes we need to specify the coordinates to which the machine will travel, the offsets to the center of the arc or the arc radius and optionally the number of additional turns the machine will make while performing the move. The speed of these movements is also defined by the F-word (feed rate).

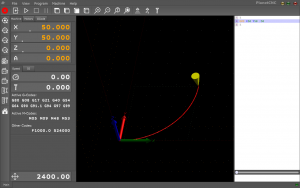
For example: Starting from X0 Y0 Z0, we would like to round a 90 degree corner using a counterclockwise arc to X50 Y50 Z0. To do this we will use the command G03 X50 Y50. But this command isn’t complete yet and the program would signal an error if we tried to use it like that. We still need to specify the center of the arc. This is done by specifying offsets from the starting position or with the deprecated method of specifying the radius.

The offsets are simply the distance from the starting position to the center of the arc. The offsets are separated into components for each axis. The center also needs to be equidistant from both the starting and the destination point. Otherwise the arc won’t be part of a circle and the controller will signal an error accordingly.

As we said, the offsets are the distance the machine would need to move along each axis separately to get to the center. In our case (starting from the origin) this would be 50 units along the Y axis. This also means that the radius of the circle will be 50 units (the radius equals the distance from the center to the origin or destination). Now we need to specify the offsets to the machine. To do this we use I, J and K-words for the X, Y and Z axes accordingly. When we put all this together we get the final code that looks like this: G03 X50 Y50 J50.

G03

Using spindle and coolant g-codes with PlanetCNC TNG software

A fundamental operation in CNC machining is controlling the spindle. It is controlled in g-code using M3, M4 and M5 commands.
M03 will start the spindle turning clockwise.
M04 will start the spindle turning counterclockwise.
Both commands turn on the spindle at the speed determined separately by the S-word. It is used to set the RPM at which the spindle will turn when turned on.
M05 will stop the spindle regardless of direction.

Other than controlling the spindle, the M03 command can also turn on a plasma cutter, laser, water jet or even a hot wire for cutting polystyrene foam. Their power is likewise set using the S-word.

When machining some materials, most often metals, it is sometimes required to use coolant. It can be supplied to the tool and on the work in different ways. There are three commands for coolant control.
M07 will turn on the mist coolant supply.
M08 will turn on the flood coolant supply.
M09 will turn both coolant supplies off.

As with M03, these commands can be used to control something else, as they just turn an output on the CNC USB controller on or off. For example one of the codes could be used to control the dust collection vacuum for a woodworking machine.

The M07, M08 and M03 commands can also be activated manually using the buttons from top toolbar:
CoolantFlood CoolantMist SpindleM3


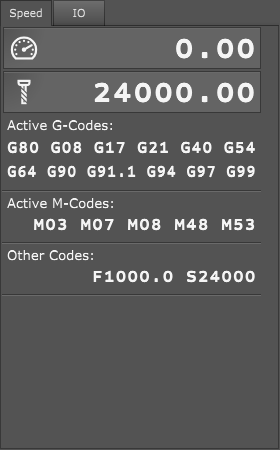
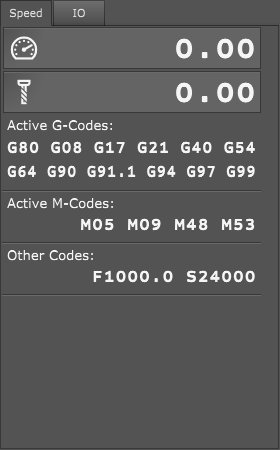
Currently active M-codes will also show up in the machine state display.

M03M07M08M05M09

Using G00 and G01 g-codes with PlanetCNC TNG software

When it comes to g-codes that specify machine motion we need to mention G00 and G01.
G00 or also known as rapid or traverse move. G00 command is usually used for moves when machine travels from position to position above the material and when no cutting is applied.
When G00 command is stated we also need to specify in which direction move will occur. For example: G00 X100 Y50
Speed at which this move will be executed is usually maximum speed of machine.

G01 command activates linear motion of machine. We use G01 with moves when machine is moving tool trough material and therefore applying various types of cutting.
Normally speed of G01 move is set with F-word(distance/time). In this case F stands for feed rate, which specifies speed in mm/min or inch/min.
When G01 command is stated we also need to specify in which direction move will occur. For example: G00 X10 Y5 F1000

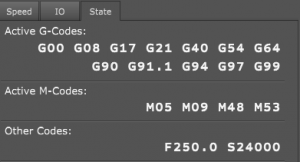
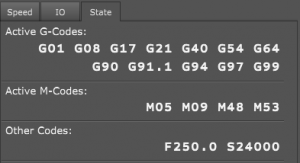
g00

g00g01

Using “Optional Pause” feature with PlanetCNC TNG software

PlanetCNC TNG software supports, next to the conventional M00 pause, also optional M01 pause.

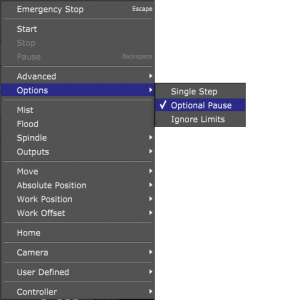
While M00 command pauses program every time when it appears in program, M01 pauses program only when “Optional pause” option is enabled in machine menu: Machine/Options/Optional pause
optionalpause_menu

You can enable/disable optional pause while program is running, so you would not need to restart the program in order to use optional pause feature.

Example:
You can insert M01 optional pause at different locations in your program.
So when you run your program for the first time, you can have these pause checkpoints in-between, where you can check up on machine or machining parameters, measure your work piece or tool wear, check fixture position etc..

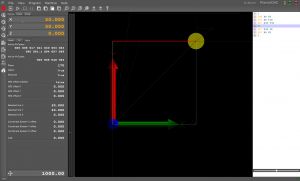
Optional pause disabled:
optionalpause_disabled

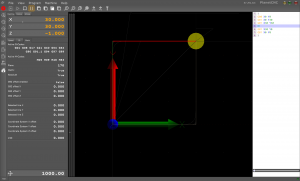
Optional pause enabled:
optionalpause_enabled

You can download “Optional pause” example program here: Optional pause example

Using “Block Delete” feature with PlanetCNC TNG software

This feature comes useful when you need to test proof your program or if you have two versions of the same workpiece with minor changes etc…
In such case you can use “Block delete” feature which allows you to skip or execute marked lines of g-code of your program.

Block delete feature executes or skips lines of program that have character “/” at the beginning of the program line:
blockdelete_g-code

Example:
Lets say we would like to create two half’s of one part. For first half we would like to mill the cutout and holes, while for other we would like to create also pockets for screw heads.

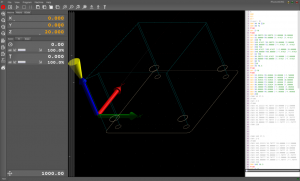
Bottom screenshots display the same program file, with Block delete option disabled in first case and Block delete option enabled in second case:

With “Block delete” disabled:

blockdelete_disabled

With “Block delete” enabled:
blockdelete_enabled

You can see how quickly we can get two versions of the same file using this feature.

You can download “Block Delete” example program here: Block delete example